
Setup server part for Xamarin Forms Push Notifications
For sending push notifications to Xamarin Forms app we need to configure Azure and Firebase, update the existing Xamarin Forms App, and we need to have a server part because the initiator of the push message (e.g. another smartphone or a server, wherever the action appeared) will not send directly to Azure. Instead, the message is sent to a server component which will take care about the sending of the push notification to Azure. So current post shows how to setup the server component.
This posting is part of a series of 3 postings regarding push notifications with Xamarin Forms:
- Configure Azure and Google Firebase for push notifications in Xamarin Forms
- Setup server part for Xamarin Forms Push Notifications (the current posting)
- Setup Xamarin Forms Android App for Push Notifications
Create new mobile app in Azure
Even though we have already an existing web app in Azure, the easiest way to work with push notifications is to setup a new mobile app in Azure. This has several advantages: If we migrate our web app someday away from Azure, we could leave the push notification as it is so we only have to take care about migrating the web app. Same for the other way round: If we want to only use Firebase (as it also supports iOS push notifications) and get rid of Azure push notifications, we could leave the web app on Azure if we are fine with that. And another reason: It’s the easiest way to setup at the beginning 🙂
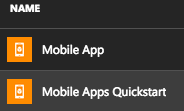
So create a new resource in Azure and search for “Mobile App”. You will find “Mobile App” and “Mobile App Quickstart”. To get it running quickly, just select “Mobile App Quickstart”.
Enter a name and select subscription, resource group and app service plan.
Once it’s created, open your new mobile app in Azure and select “QuickStart”.
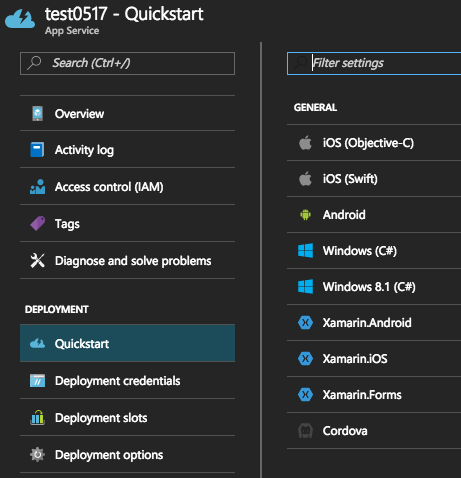
You could download quickstart code for several platforms, including Xamarin Forms so select it here.
On next screen you could have to set up a SQL Server connection and you could download 2 zip files: One for the server part, and one with the quickstart example for Xamarin Forms. So download and extract both.
Configure Push Notifications
Back to your mobile App, go to section “Settings”, select “Push” and click “Connect”. In new window select your new notification hub which you have created earlier and you’re finished.

Publish server part
Once you have downloaded and extract the server part, open it with Visual Studio. Retrieve the nuget packages and compile the application. It should work fine out of the box. And the publishing profile is already included. So just click “Build” -> “Publish” and your quickstart server part should be uploaded to Azure. As soon as it’s uploaded, Visual studio will open a browser window showing the server part.
Update nuget packages
So we have now deployed the mobile app with push notifications for the ToDoItem Test Application. Now check whether any nuget packages should be updated. Click “Tools” -> “NuGet Package Manager” -> “Manage NuGet Packages for Solution”. Check the “Updates” Tab to see whether any updates should be made. Select all outdated packages and update them.
When you later on build your app, you might get a configuration warning regarding release version of System.Net.Http.Formatting and System.Web.Http. Web.config has 5.2.3.0 as latest version, but now 5.2.4.0 (or higher) is already available.
Consider app.config remapping of assembly “System.Net.Http.Formatting, Culture=neutral, PublicKeyToken=31bf3856ad364e35” from Version “5.2.3.0” [] to Version “5.2.4.0” [C:\Projects\Notifications\packages\Microsoft.AspNet.WebApi.Client.5.2.4\lib\net45\System.Net.Http.Formatting.dll] to solve conflict and get rid of warning.
1> Consider app.config remapping of assembly “System.Web.Http, Culture=neutral, PublicKeyToken=31bf3856ad364e35” from Version “5.2.3.0” [] to Version “5.2.4.0” [C:\Projects\Notifications\packages\Microsoft.AspNet.WebApi.Core.5.2.4\lib\net45\System.Web.Http.dll] to solve conflict and get rid of warning.
To fix this problem, go to your web.config and update the binding redirect accordingly. Just search for 5.2.3.0 and replace it with 5.2.4.0.
Remove ToDoItem Parts
But as I don’t want to implement it into a todo item app, I have removed some parts and updated the PostToDoItem method in the ToDoItemController.cs. in Controllers Directory.
First add the Notification Hub Package. Go to your NuGet Package manager again and open tab “Browse”. Enter “NotificationHub” in the search bar and install package “Microsoft.Azure.NotificationHubs”
Now make sure to add these 3 using statements to the header of the file:
using Microsoft.Azure.Mobile.Server.Config;
using System.Collections.Generic;
using Microsoft.Azure.NotificationHubs;
Here is my updated ToDoItemController.cs file:
public async Task<IHttpActionResult> PostTodoItem(object test) //(TodoItem item)
      {
          //TodoItem current = await InsertAsync(item);


          // Get the settings for the server project.
          HttpConfiguration config = this.Configuration;
          MobileAppSettingsDictionary settings =
              this.Configuration.GetMobileAppSettingsProvider().GetMobileAppSettings();

          // Get the Notification Hubs credentials for the Mobile App.
          string notificationHubName = settings.NotificationHubName;
          string notificationHubConnection = settings
              .Connections[MobileAppSettingsKeys.NotificationHubConnectionString].ConnectionString;

          // Create a new Notification Hub client.
          NotificationHubClient hub = NotificationHubClient
          .CreateClientFromConnectionString(notificationHubConnection, notificationHubName);

          // Sending the message so that all template registrations that contain "messageParam"
          // will receive the notifications. This includes APNS, GCM, WNS, and MPNS template registrations.
          Dictionary<string, string> templateParams = new Dictionary<string, string>();
          //templateParams["messageParam"] = item.Text + " was added to the list.";
          templateParams["messageParam"] = " item was added to the list.";

          try
          {
              // Send the push notification and log the results.
              var result = await hub.SendTemplateNotificationAsync(templateParams);

              // Write the success result to the logs.
              config.Services.GetTraceWriter().Info(result.State.ToString());
          }
          catch (System.Exception ex)
          {
              // Write the failure result to the logs.
              config.Services.GetTraceWriter()
                  .Error(ex.Message, null, "Push.SendAsync Error");
          }

          TodoItem current = new TodoItem();
          current.Id = notificationHubName;
          current.Text = notificationHubConnection;
          current.Deleted = false;
          current.CreatedAt = System.DateTime.Now;
          current.UpdatedAt = System.DateTime.Now;


          return CreatedAtRoute("Tables", new { id = current.Id }, current);
      }
So basically I have just removed the InsertAsync and changed the output text as this makes it easier for testing. Additionally the returned ToDoItem contains some information like notificationHubName so you see whether the correct values are used.
Test with Postman
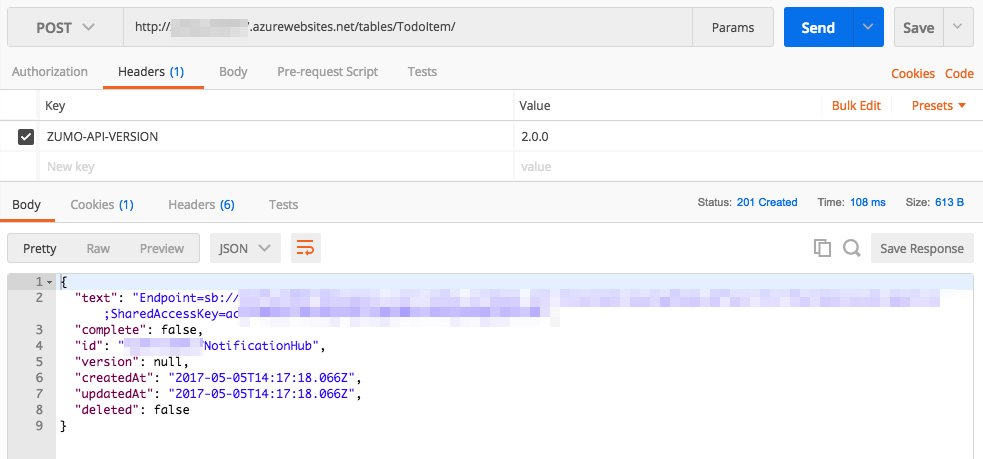
With a tool like Postman it’s now easy to test whether the server part works fine. Just enter the URL of your API, select type “POST” and add header “ZUMO-API-VERSION” = “2.0.0”. Click on “SEND” and if everything works fine you should now see the returned todoitem in JSON-Format containing the name of your NotificationHub etc.
So now your mobile app is ready to send push notifications to clients.
Take care: Once you are live you should of course add some security checks so that no one is able to publish push notifications for your app by simply sending a POST request to your mobile app…
So now it’s time to setup Xamarin Forms Android App for Push Notifications…


1 Comment